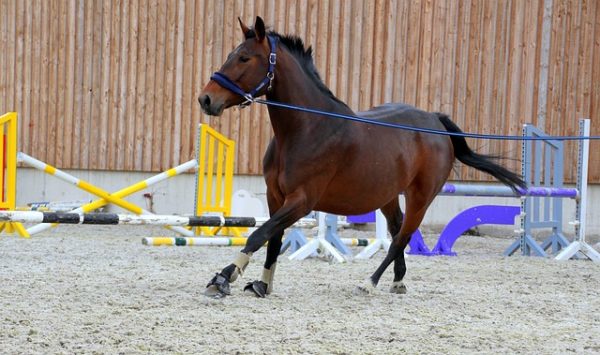
Lungeing is a form of schooling that can be used throughout a horse’s L active life. Control is primarily through the lunge rein reinforced by the trainer’s voice and, to a lesser extent, the lunge whip. Lungeing teaches the horse to trust, understand and obey the trainer and helps to build concentration, muscle structure, rhythm, strength and patience. With a young horse in particular you hope to achieve all this Without the unaccustomed and difficult-to-balance weight of the rider on the horse’s back.
The main uses of lungeing are:
- The early training of a young horse;
- Suppling exercises for horses in work;
- Retraining of older horses;
- Establishing schooling practices for horses coming back into work after a break;
- Exercising horses that cannot be ridden;
- Initial exercise for a horse that is overexuberant before being ridden;
- Advanced schooling work;
- Training riders to help With co-ordination and balance.
Voice commands
Voice commands must be simple, clear and different from each other so that the horse can easily recognise and understand each one and not get confused by two words sounding the same. You need to decide which words you will use for each command and say the same word each time. All upward transition words should be said with an upward lift to the voice, encouraging the horse to move forward and increase their pace, all downward transition words should have a downward, low tone to them and be long and drawn out to allow the horse time to execute the movement. I always use the horse’s name first in all upward transitions, once the horse knows his name it becomes easy to gain his attention.
In the training of carriage horses, when driving more than one horse at a time, by using a horse’s name, it is possible to single out one horse without making the others respond as well. If one horse is hanging back, for example, you call his name and, because each horse is accustomed to move forward in response to his name, he pays attention and moves up into his collar. No other horse should respond as they will know you were not speaking to them. With a voice command for all the horses you use something like ‘boys, walk on’ or ‘everybody, walk on’.
The correct equipment
Using the correct equipment for lungeing your horse will make the task much easier; everything must be well-made and strong. It is very important to lunge correctly because so much damage can be done if the horse is allowed to just gallop around a small circle in only a cavesson or headcollar on a lunge line.
Remove excess equipment
As with all pieces of schooling equipment, any unnecessary tack should not be used. If you are not going to ride immediately after lungeing take the reins off your bridle. If you are to ride straight away make sure that the reins are firmly secured so that there is no possibility of the horse’s hooves getting caught up in them or the horse receiving a nasty slap in the eye. Unsecured pieces of equipment hanging and flapping around the horse are very dangerous and distracting and with certain horses very frightening. Any such incidents caused by loose equipment can be potentially dangerous or, if you get away Without serious accident, could result in the horse being reluctant to be lunged in the future.
Saving time
If you are using your lunge work as a prelude to your ridden work, rather than have to go back to the yard to spend time changing from lungeing equipment to riding gear, by far the best way is to lunge by placing the lungeing roller over the saddle. It is far easier to fit pieces of schooling equipment to the easy-to-reach and numerous D rings provided on a lungeing roller than to have them slip to different levels under the saddle flap of your saddle. Then, when you are ready to ride you only need to remove the outer lungeing equipment and the horse is ready to work under saddle.
Lungeing Cavessons
It is most important that the lunge cavesson should fit the head well and not twist as the rein is used. Depending on which style you choose, there should be a strap on the cheek of a cavesson that enables you to secure the cheek well back from the horse’s eye. If a throatlatch is also fitted this should be loose to allow the horse to flex his head without pressure on the throat. The nosepiece will take most of the pressure so it should be strong and well padded. The centre ring should be strong and on a swivel and any additional side rings should be secure to allow side reins to be fitted if necessary. In original patterns of lungeing cavessons, these side rings were more correctly placed on the nosepiece just under the cheekpiece and therefore in a better and more useful position for attaching side reins.
Young Horses
When you work a young horse on the lunge keep the equipment simple, take the noseband off the bridle and remove the reins if this is to be a lunge-only session. Make sure the noseband and the throatlatch of the cavesson are done up under the cheekpieces of the bridle so that no part of the bridle digs into the horse’s face and the cavesson does not interfere with the action of the bit if you have schooling equipment attached to the bit.
The Wels lungeing cavesson
This is the only cavesson that can be used as a drop noseband as well as a conventional lungeing cavesson. It is unique as the metal nosepiece has two joints, one on either side of the nose, and no joint in the centre. This makes for a much better and closer fit around the horse’s nose. There is no throatlatch but a cheek strap set much lower on the cheekpiece to create a snug fit enabling the cheek to be angled well back from the eye. It is made of good quality English leather with a soft well-padded leather nosepiece.
TO FIT: The nosepiece should be fitted at the same height as a cavesson noseband, i.e. high enough not to affect the horse’s breathing. The noseband should fit firmly so that the nosepiece cannot slide from side to side and the cheek strap should fit under the horse’s cheek bone firmly so that the cheek of the cavesson is slightly angled back. This helps to prevent the cheeks lying uncomfortably near the horse’s eye.
E. Jeffries leather cavesson
This is a traditional design and a substantially made cavesson. It has buckles on either side of the headpiece for ease of adjustment and a well-padded nosepiece with the padding extending around most of the nose. As with all leatherwork, the better the quality of leather and the better maintained it is, the softer and suppler it is next to the horse’s skin.
TO FIT: It is important that you get the right size of cavesson for your horse or pony. A 12 hand Welsh pony is going to find a cob-size cavesson very uncomfortable. If the nearest size available does not fit well it is possible to get your saddler to make a few adjustments in order to achieve the best fit. Again, as with all pieces of equipment fitted to the horse’s nose, it should be high enough not to affect the horse’s breathing and the cheeks should be firmly secured well back from the eye area.
Webbing cavesson
There are several designs of webbing cavesson on the market, some of them fit reasonably well, others do not. If you follow the correct principles for fitting a lunge cavesson it will become immediately apparent which fit well and will do a good job and which will be uncomfortable for the horse, will move on the face and interfere with the job of successful lungeing.
TO FIT: It is important that you try to achieve the best fit possible from a webbing cavesson; try to get the noseband to {it closely to the nose so that side to side movement is reduced to a minimum. The main fault with these cavessons is they do tend to be very large around the nose and twist round as the lunge rein pulls the horse into a circle. Some are designed in such a way that it is difficult to secure the nosepiece of the cavesson under the cheeks of your bridle. When you have put the cavesson over your bridle you may have to undo the cheeks of the bridle and then do them up again on the outside so that the cavesson lies neatly next to your horse’s face.
Side Reins
Side reins should not be adjusted too tightly to force a horse into a certain head carriage; this will simply make the horse tuck his head into his chest without engaging the quarters or working the back properly and the stride will become short and stilted. Once a horse has learnt to drop the contact with the bit it is very difficult to encourage him to take it up again as each time the rein is taken up the horse thinks it is correct to tuck his head in and drop the rein. You are always trying to achieve a state whereby the horse reaches forward and seeks to take up the contact.
TO FIT: The side reins should not be fitted onto the bit until the horse is in the schooling area in which he is to work, and then they should be attached to the bit so that they are straight without any tension when the horse’s head is in a natural and relaxed position at the halt. If you are trying to create a very long low stretch with a deep profile then the reins can be attached side by side in between the horse’s front legs by being looped around the girth then up to each bit ring. To use side reins attached in this way is not suitable for a very young or overexuberant horse as there is always a risk of the horse catching his legs in the reins. If you want to encourage a less deep response, attach the reins to the girth straps under the saddle Hap above the girth or preferably onto the side rings of a lungeing roller.
Solid leather
This type of side rein has no give in it at all and is used more frequently on trained older horses rather than on young less experienced animals. Some older horses will have learned to lean on elasticated side reins to test the strength of them.
Leather with an elastic insert
Made of good quality leather like the solid leather side reins, but these incorporate an elastic insert to provide more give as the horse is worked.
Leather with a rubber ring insert
These side reins have a rubber ring insert with a piece of leather continuing behind the ring to prevent it stretching too far.
Leather with a snubber
The same principal applies to these side reins but, instead of a piece of elastic material, a strong rubber snubber is used. The snubber is actually so substantial that it has very little give if any at all.
Nylon with an elastic insert
This is the least expensive form of side rein. It is not as easy to ensure that these reins are of the same length as they are fastened by a rocko buckle (sliding buckle) instead of a conventional buckle with a tongue that fits into specific holes thus making equal adjustment easier. In addition, they are usually quite short so are not suitable for large horses as they cannot be adjusted to comfortably accommodate longer necks.